找回密码
 立即注册
搜索
热搜: 活动 交友 discuz
查看: 43|回复: 0

幻想神域Linux手工外网端+客户端+登录器+工具+详细教程

[复制链接]
发表于 2024-6-28 05:39:30 | 显示全部楼层 |阅读模式
幻想神域Linux手工外网端+客户端+登录器+工具+详细教程
CentOS Linux release 7.1  64  
1.安装PostgreSQL:
  1. rpm -Uvh http://yum.postgresql.Org/9.4/redhat/rhel-6-x86_64/pgdg-centos94-9.4-1.noarch.rpm
复制代码
  1. yum install postgresql94-server postgresql94-contrib
复制代码

2.检验是否安装成功:

rpm -aq| grep postgres

3.初始化数据库:

service postgresql-9.4 initdb

4.设置开机启动数据库:

chkconfig postgresq1-9.4 on

5.重启数据库:

service postgresql-9.4 restart

6.配置数据库远程和加密模式:

a.远程访问路径:/var/lib/pgsql/9.4/data

格式如下:

listen_addresses = '*'


port = 5432


b.加密模式如下:

# TYPE   DATABASE     USER       ADDRESS            METHOD


# "local” is for Unix domain socket connections only
#local        all              all                                 peer
local  all             all                                trust
#        IPv4 local connections:
#host        all        all        127.0.0.1/32        ident
host all        all        127.0.0.1/32        md5
host        all        all        0.0.0.0/0        md5
#        IPv6 local connections:
host        all        all        ::1/128        ident
#        Allow replication connections from localhost, by a user with the
#        replication privilege.
#local        replication        postgres        peer
#hcst        replication        postgres        127.0.0.1/32        ident
#host        replication        postgres        ::1/128        ident


最后使用命令重启数据库。


7.配置数据库账号和密码,以及建立所需表格:

a.设置数据库账号和密码:

设置数据库密码为:antiroot

su - postgres

psql

ALTER USER postgres WITH PASSWORD 'antiroot';

CREATE USER postgres WITH SUPERUSER PASSWORD 'antiroot';

ALTER USER postgres SUPERUSER;

\q

exit


创建数据库和导入:

psql -U postgres FFAccount < /root/sql/FFAccount.sql
psql -U postgres FFDB1 < /root/sql/FFDB1.sql
psql -U postgres FFMember < /root/sql/FFMember.sql
psql -U postgres postgres < /root/sql/postgres.sql

修改数据库ip:

FFAccount库-worlds表  两个ip 192.168.1.99   改成外网

FFDB1库-serverstatus表  四个ip  192.168.1.99  改成外网

上传服务端hxsy.rar到root目录下,解压:

chmod -R 7777 /root


服务端修改:

/root/hxsy_ar/TicketServer/setup.ini  改成外网ip

下面的修改重点来了:

/root/hxsy_ar/LoginServer/LoginServer   改成外网ip

/root/hxsy_ar/MissionServer/MissionServer  改成外网ip

/root/hxsy_ar/WorldServer101/WorldServer101  改成外网ip

/root/hxsy_ar/WorldServer102/WorldServer102  改成外网ip

/root/hxsy_ar/ZoneServer101/ZoneServer101  改成外网ip

/root/hxsy_ar/ZoneServer102/ZoneServer102  改成外网ip

修改这些就是重点:用ue打开这些文件,搜索一下DEDEDE  这个是ip的前三组比如 222.222.222.0 的16进制就是DEDEDE00

那么 这样是:

DE=222

DE=222

DE=222

00=0

再比如:192.168.1.2,这样就是C0A80102  那么这样是:

CO=192

A8=168

01=1

02=2

但我们只要前3组,那么是COA801

也可以使用 工具 包里面的懒人计算器

服务端启动:

./ar

服务端查看端口情况:

netstat -lntp

本地成功端口信息:

tcp        0      0 0.0.0.0:6543                0.0.0.0:*                   LISTEN      1970/./LoginServer  
tcp        0      0 0.0.0.0:111                 0.0.0.0:*                   LISTEN      1162/rpcbind        
tcp        0      0 192.168.1.99:10320          0.0.0.0:*                   LISTEN      2023/./ZoneServer   
tcp        0      0 192.168.1.99:10321          0.0.0.0:*                   LISTEN      2027/./ZoneServer   
tcp        0      0 0.0.0.0:37332               0.0.0.0:*                   LISTEN      1307/rpc.statd      
tcp        0      0 0.0.0.0:22                  0.0.0.0:*                   LISTEN      1418/sshd           
tcp        0      0 127.0.0.1:631               0.0.0.0:*                   LISTEN      1367/cupsd         
tcp        0      0 0.0.0.0:5560                0.0.0.0:*                   LISTEN      1966/./GatewayServe
tcp        0      0 0.0.0.0:5432                0.0.0.0:*                   LISTEN      1452/postmaster     
tcp        0      0 127.0.0.1:25                0.0.0.0:*                   LISTEN      1538/master         
tcp        0      0 127.0.0.1:20060             0.0.0.0:*                   LISTEN      2023/./ZoneServer   
tcp        0      0 127.0.0.1:20061             0.0.0.0:*                   LISTEN      2027/./ZoneServer   
tcp        0      0 127.0.0.1:5567              0.0.0.0:*                   LISTEN      2005/./WorldServer  
tcp        0      0 192.168.1.99:5567           0.0.0.0:*                   LISTEN      2005/./WorldServer  
tcp        0      0 127.0.0.1:5568              0.0.0.0:*                   LISTEN      2014/./WorldServer  
tcp        0      0 192.168.1.99:5568           0.0.0.0:*                   LISTEN      2014/./WorldServer  
tcp        0      0 0.0.0.0:18624               0.0.0.0:*                   LISTEN      1962/./TicketServer
tcp        0      0 192.168.1.99:10021          0.0.0.0:*                   LISTEN      2023/./ZoneServer   
tcp        0      0 192.168.1.99:10022          0.0.0.0:*                   LISTEN      2027/./ZoneServer   
tcp        0      0 0.0.0.0:7654                0.0.0.0:*                   LISTEN      1978/./MissionServe
tcp        0      0 :::46635                    :::*                        LISTEN      1307/rpc.statd      
tcp        0      0 :::111                      :::*                        LISTEN      1162/rpcbind        
tcp        0      0 :::22                       :::*                        LISTEN      1418/sshd           
tcp        0      0 ::1:631                     :::*                        LISTEN      1367/cupsd         
tcp        0      0 :::5432                     :::*                        LISTEN      1452/postmaster     
tcp        0      0 ::1:25                      :::*                        LISTEN      1538/master

客户端修改:

直接用工具包里面的 FF解禁登录器.7z  

修改 connects.ini  connect.ini两个文件里面的ip  然后,替换客户端,客户端打开用 游戏启动.cmd  打开。

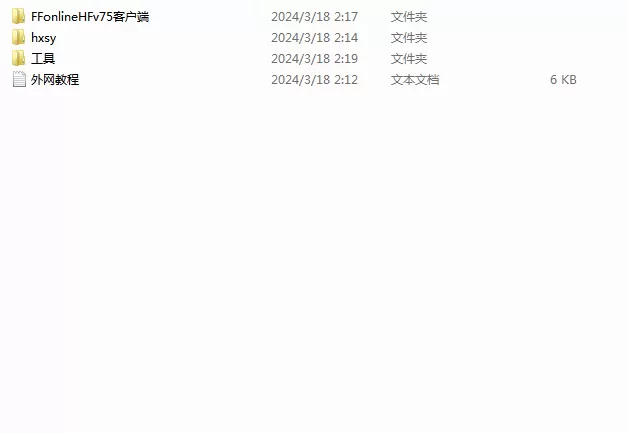
QQ截图20240318021927.webp

QQ截图20240318021927.webp

游客,如果您要查看本帖隐藏内容请回复

Archiver|手机版|小黑屋|网单游戏

GMT+8, 2026-11-6 20:58 , Processed in 0.045464 second(s), 18 queries .

Powered by Discuz! X3.5

© 2001-2026 Discuz! Team.

快速回复 返回顶部 返回列表